Quick start
A checklist from access approval to the first visible ZONE plan on TradingView
 Open full-size image
What ZONE does
Understand how large zones become a ready trade plan
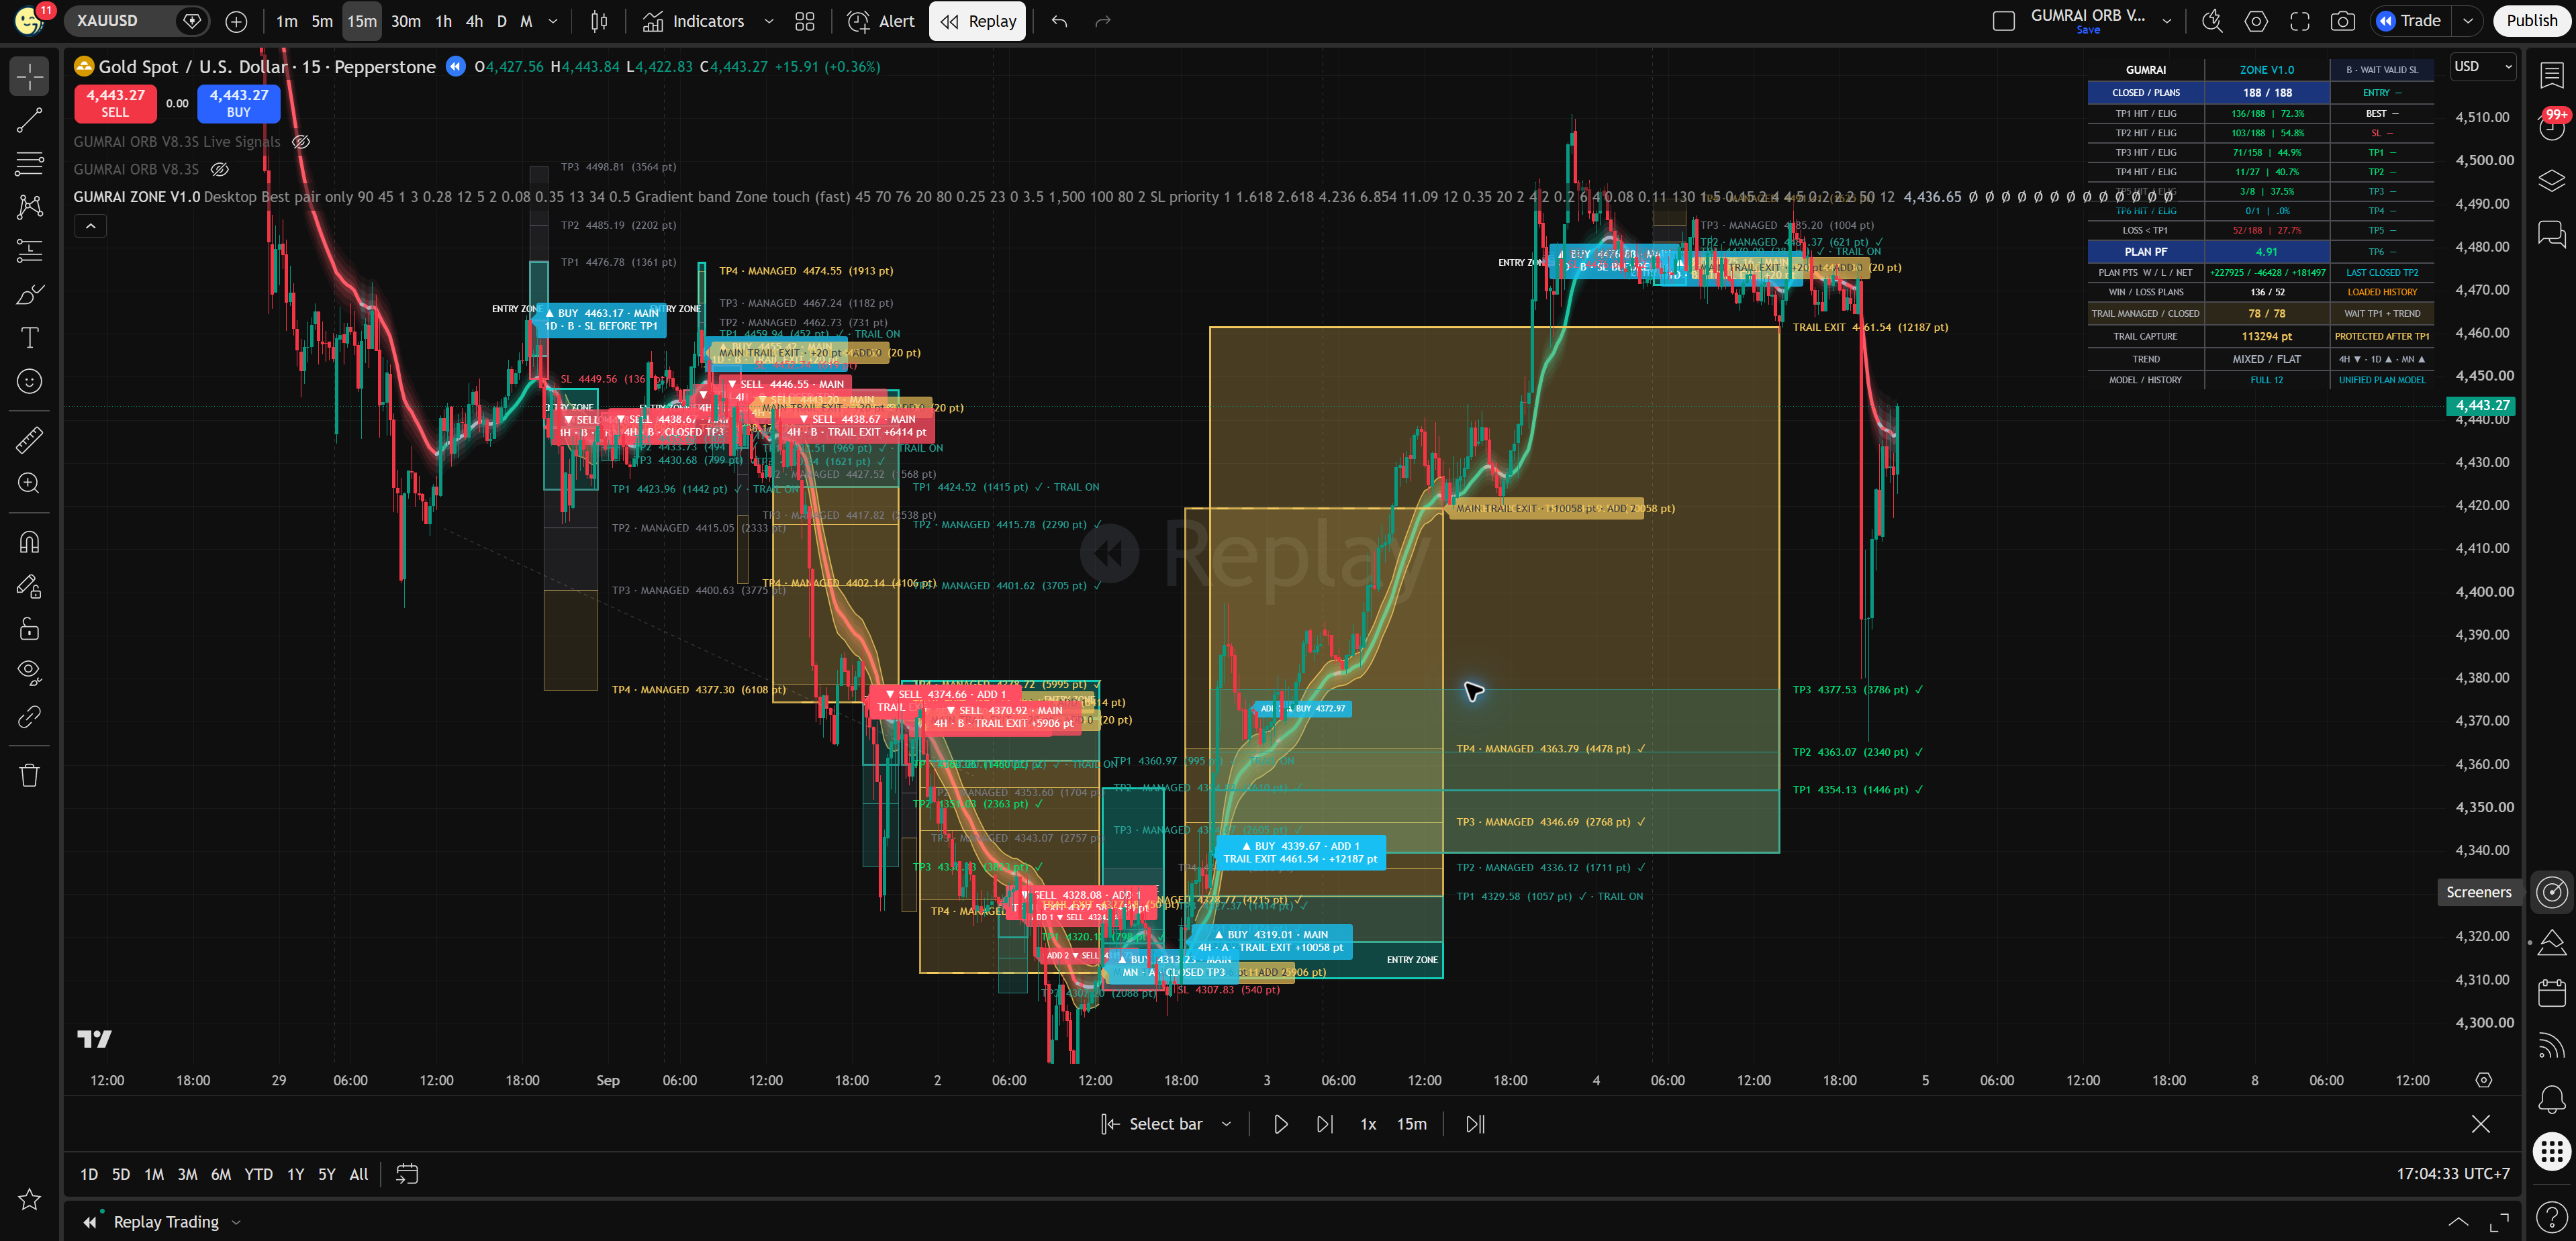
ZONE starts from important Supply/Demand areas and turns them into a ready trade plan: Entry, SL, TP, trend context, and management states shown together on the chart.
Key Zone
Large structure that tells you where price matters.
Trend Path
A path for judging continuation and caution areas.
Ready Trade Plan
Entry, SL, TP, and management shown together.
Read 4H / 1D / MN Key Zones
Separate Supply, Demand, and the structural areas behind each plan
Key Zones come from higher-timeframe structure such as 4H, 1D, and MN. They are the areas to pay attention to, not automatic buy/sell buttons.
 Open full-size image
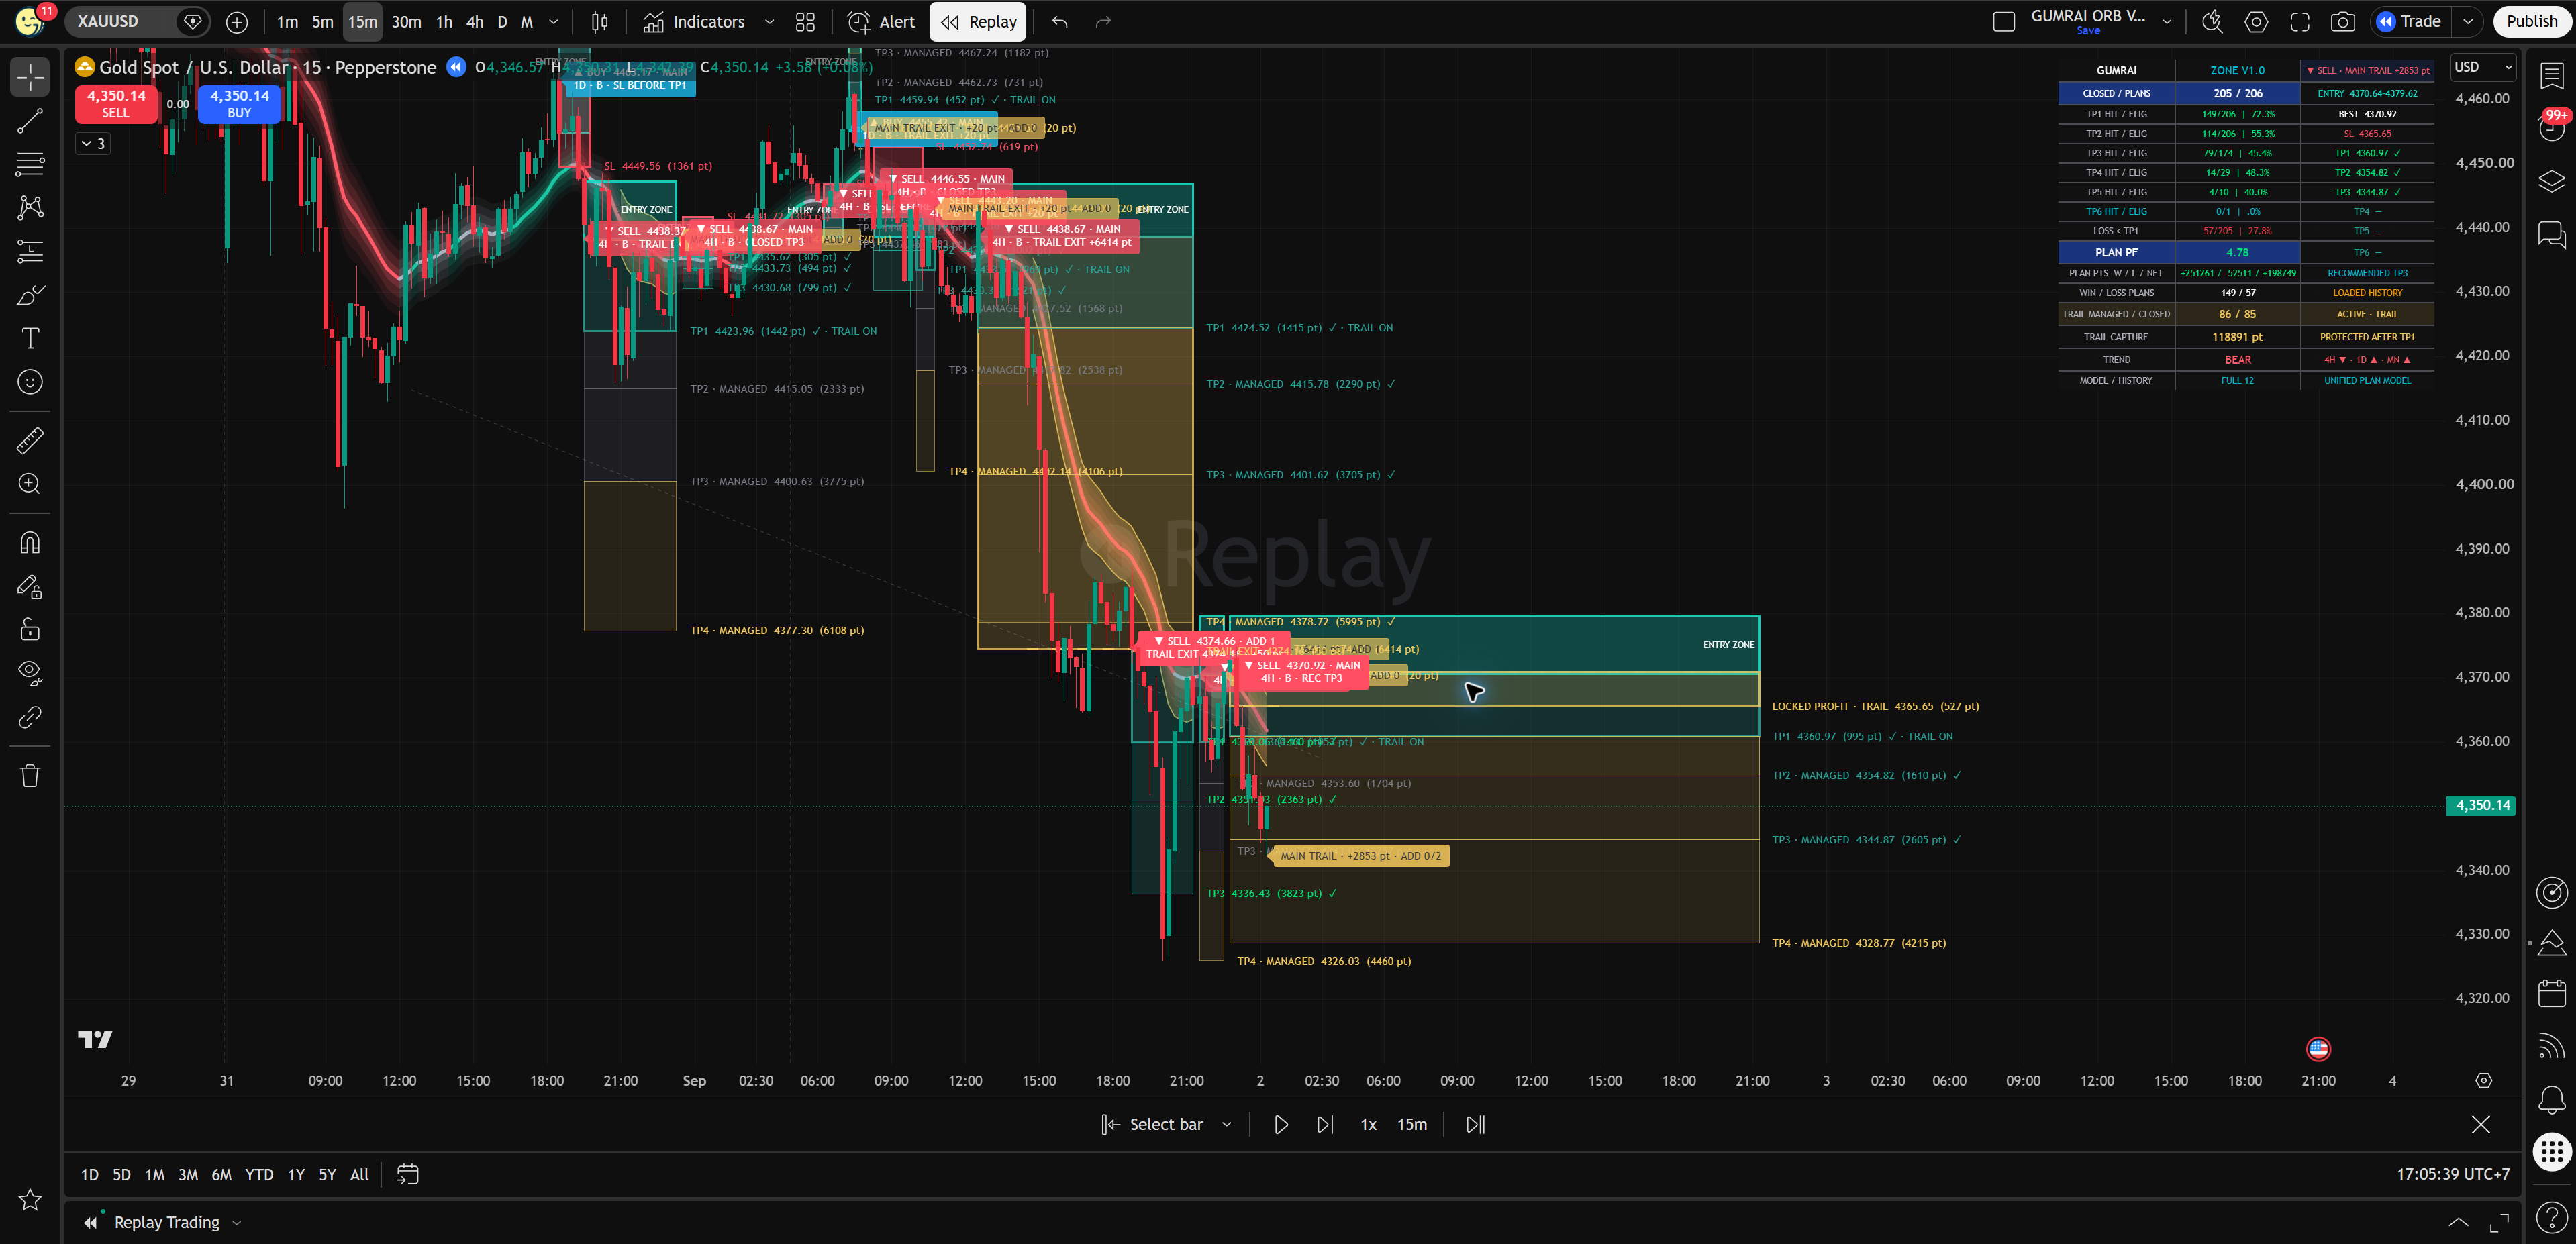
Read Trend Path
Use the path to judge where price may continue or where caution starts
Trend Path is the visual path that helps you see whether the trade still has room to continue. If price moves cleanly with the path, you can plan management; if it rejects or loses structure, reduce risk.
 Open full-size image
MAIN, ADD, and Trail
Understand plan types and in-trade management in one system
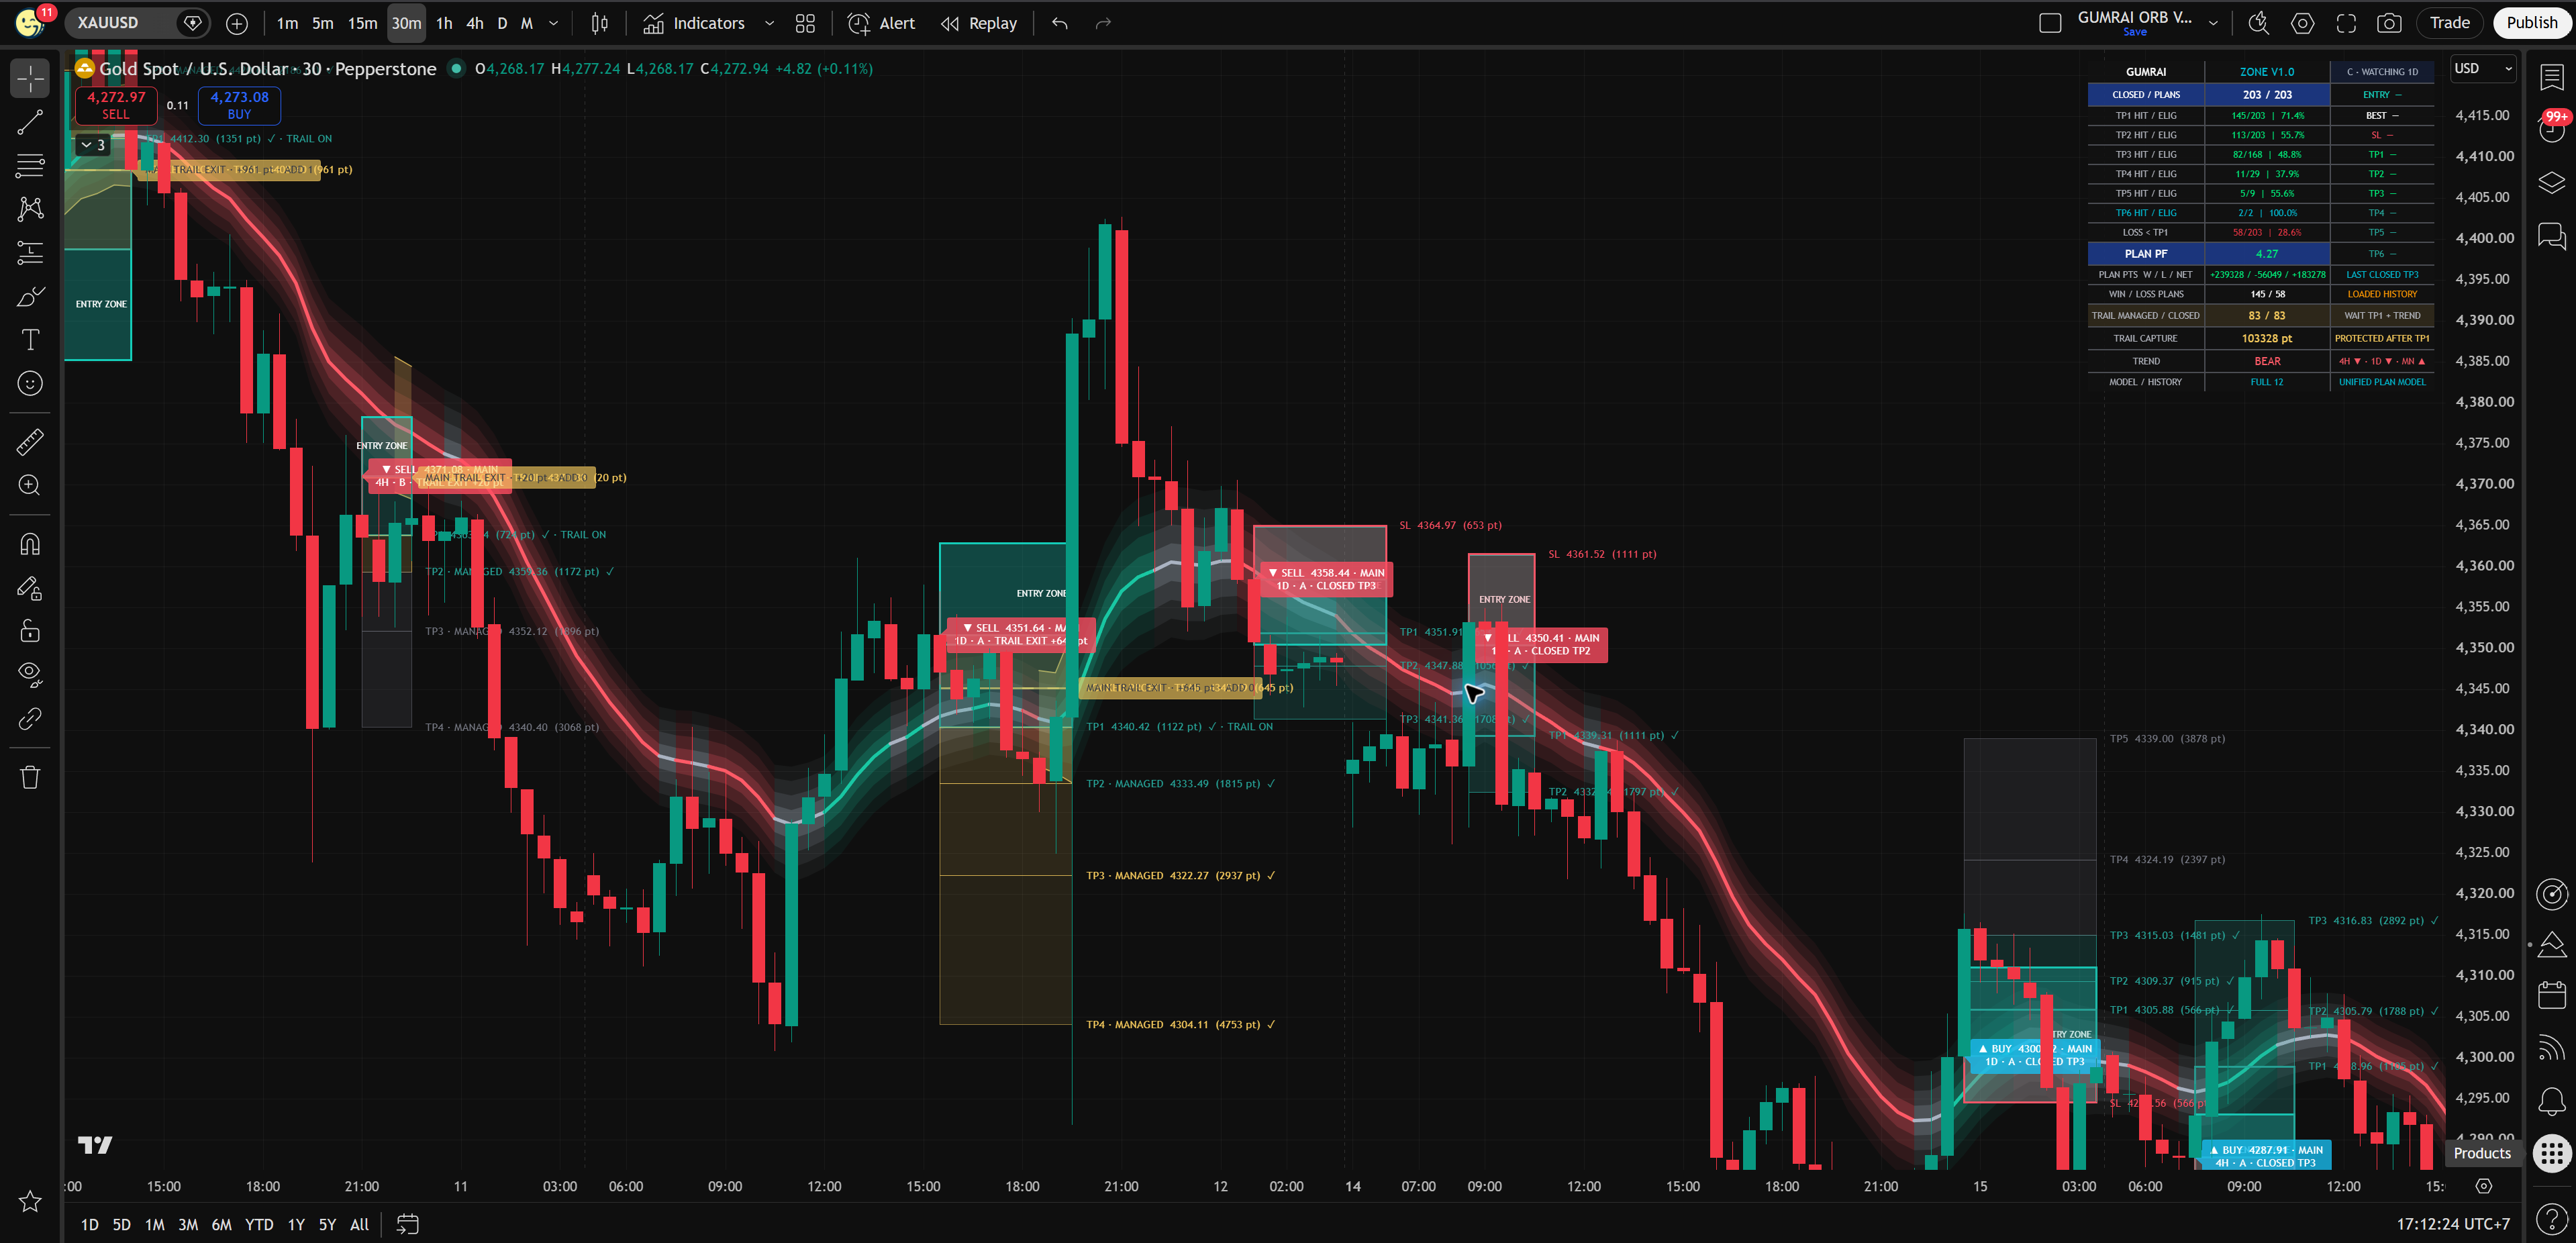
MAIN
The original confirmed ZONE plan. Treat it as the main decision map.
ADD 1 / ADD 2
Continuation entries when trend and structure still support the plan. Each add has its own Entry and SL.
Trail management
A management state for protecting profit or letting the remaining position continue. It is not a third signal system.
LIVE SETUP
A provisional live-bar box. It is not counted as a confirmed plan until the bar confirms.
Entry, SL, and risk management
Read the entry area, invalidation point, retests, and partial management
The system marks SL and targets from structure, but position sizing is still your job. A practical workflow is to wait for retest, reduce size on high-risk retests, or partially close and protect capital when price moves far enough.
TP and recommended targets
Read structure-based targets without treating them as guaranteed profit
TP
TP levels are planning levels from the current structure and R logic. Use them to plan exits, partial closes, and trailing decisions; do not read them as guaranteed profit.
SL
SL is the invalidation area. If price reaches it, the original idea is wrong enough to stop or reassess.
Partial / Trail
Use partial closes and trailing as risk management decisions, especially after price has moved far from entry.
Read the dashboard
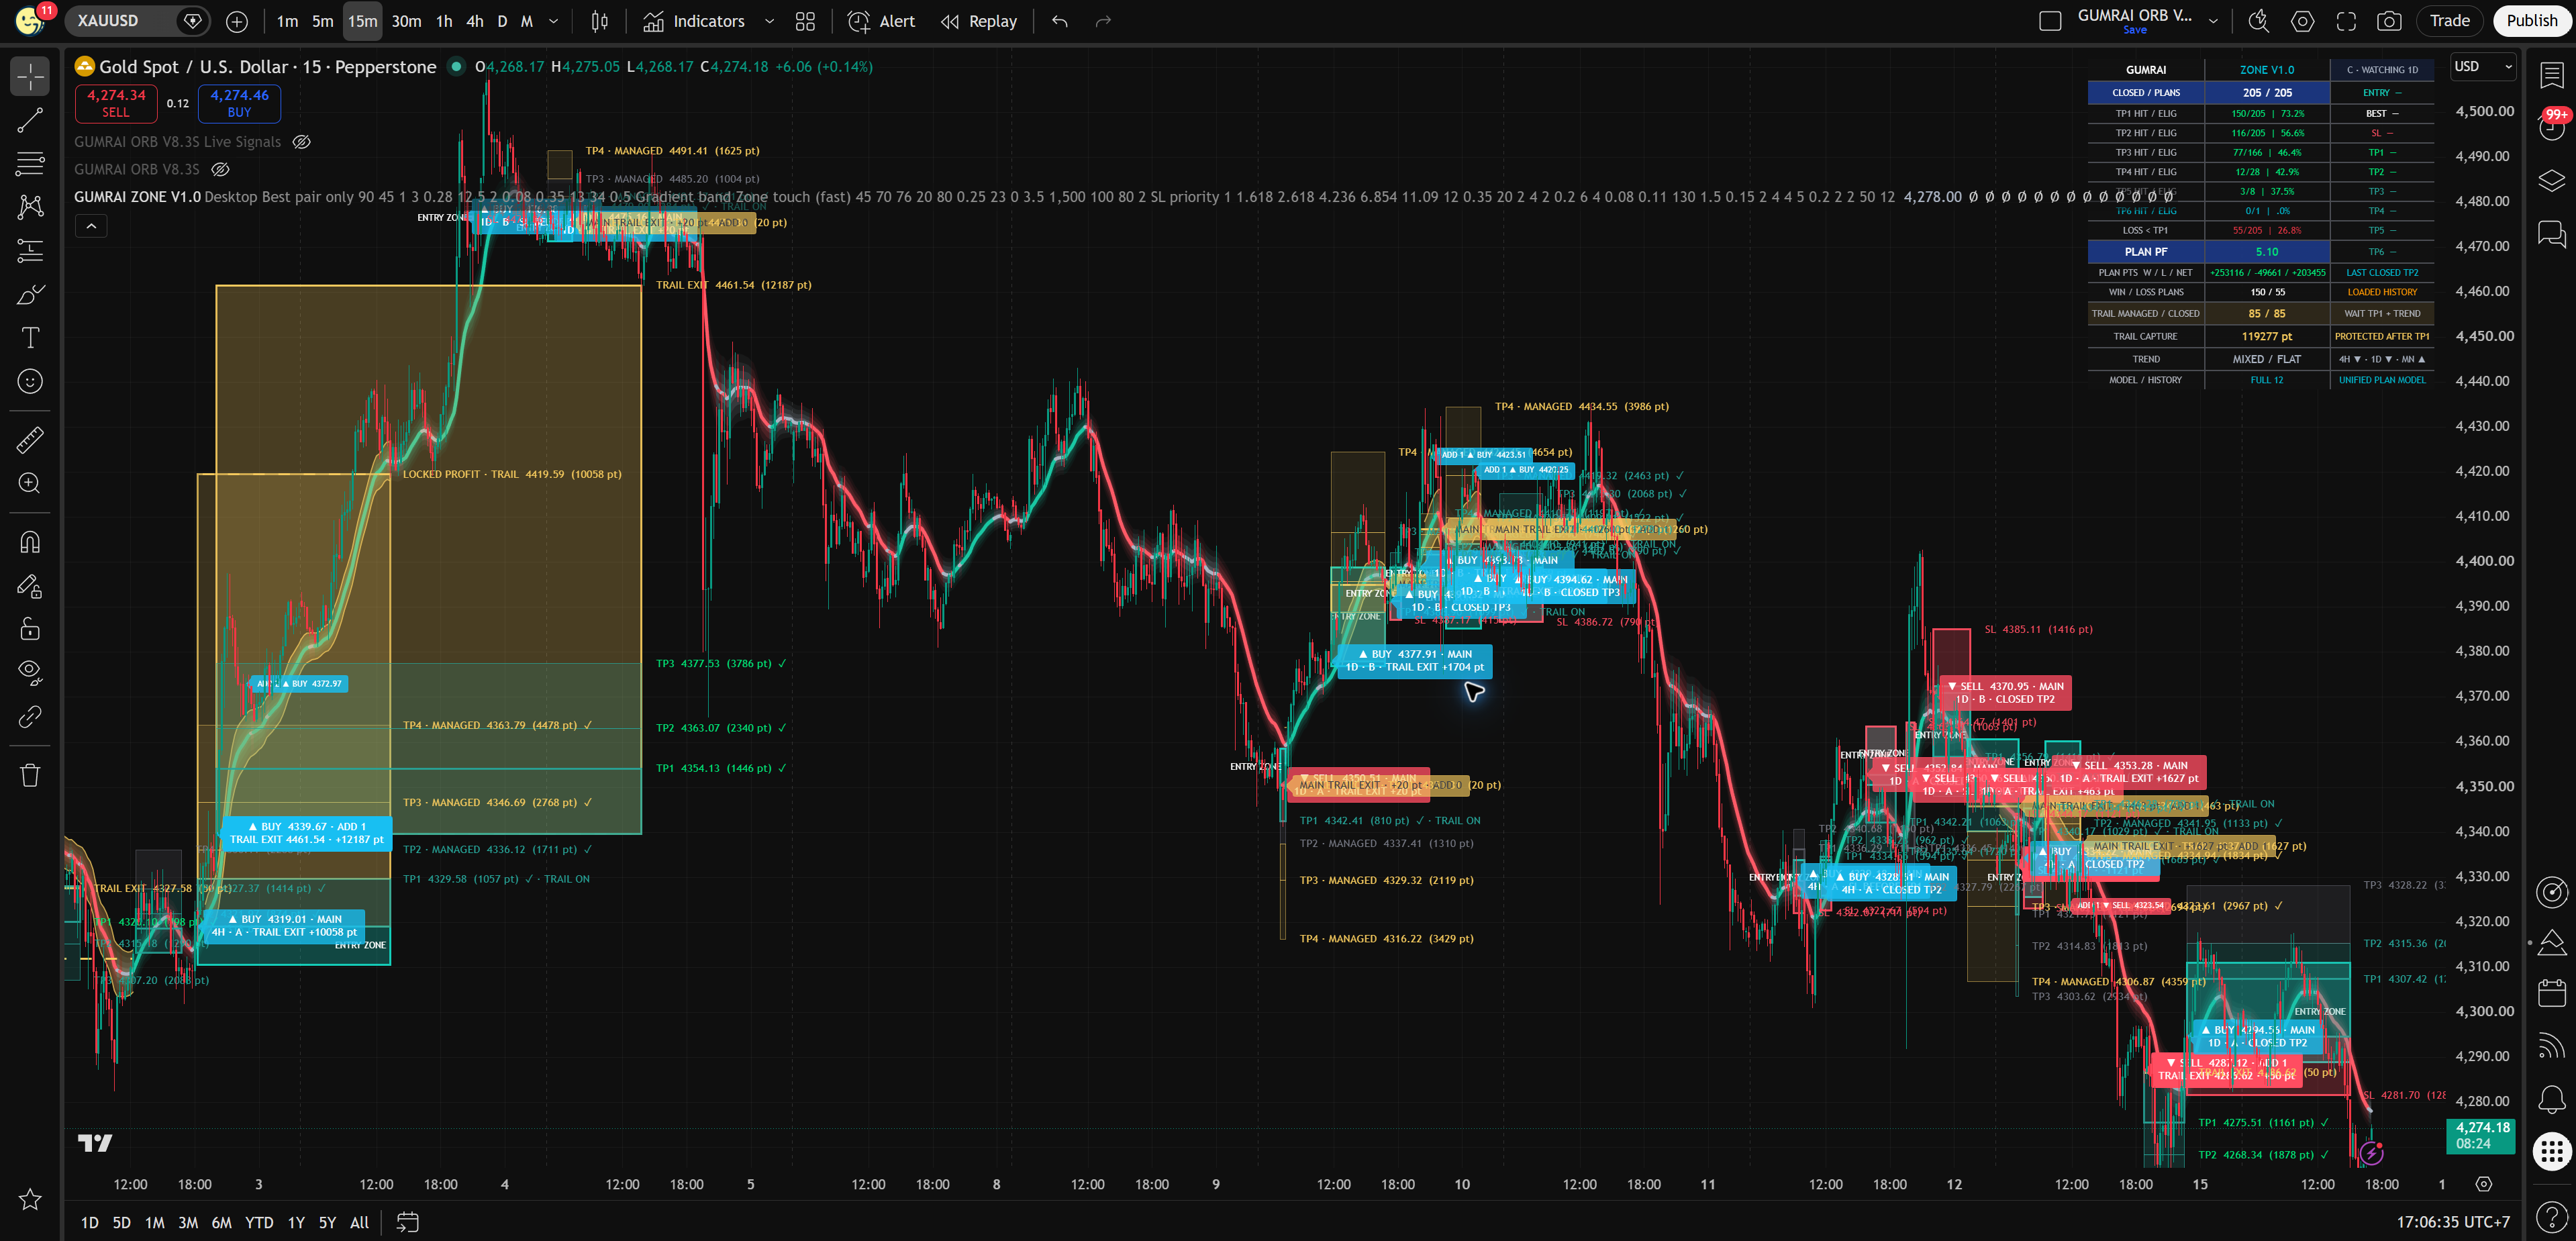
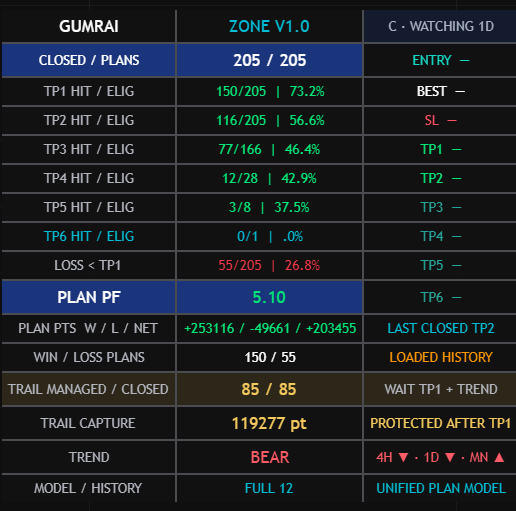
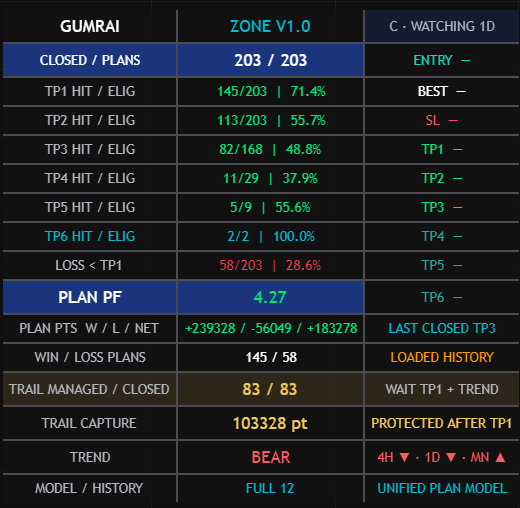
Use PLAN PF, POINTS W/L/NET, and SYSTEM TREND responsibly
Use PLAN PF (SYSTEM), POINTS W / L / NET, and SYSTEM TREND as loaded-history diagnostics. They describe what the model found in the loaded chart data, not your live-account performance.
 Open full-size image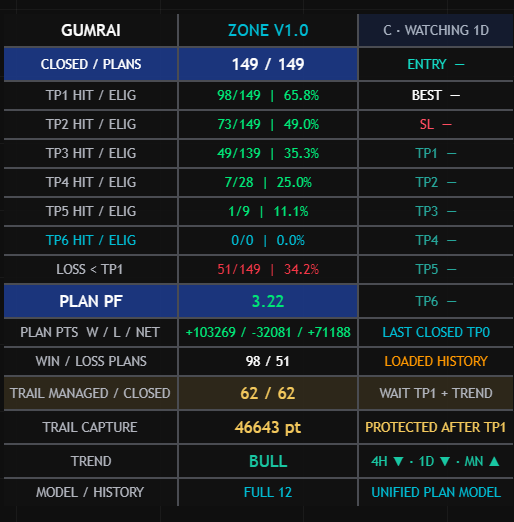
Alerts and Live Setup
Separate confirmed plans from provisional live-bar information
TradingView Alert
Use TradingView alerts for your personal plan notifications. Gumrai’s YouTube or Telegram content is a public proof/live layer, not a separate product that replaces your own risk decision.
LIVE SETUP
A live-bar setup is only provisional. Wait for confirmation before treating it as a plan.
Troubleshooting and FAQ
Fix missing zones, alert issues, and common history-data misunderstandings
Why do I see zones on a small timeframe?
ZONE can be read on the chart timeframe you trade, while the important Key Zones are derived from larger structure such as 4H, 1D, and MN.
Is LIVE SETUP a signal?
No. LIVE SETUP is provisional while the current candle is not confirmed. Wait for a confirmed MAIN plan if your process requires confirmation.
Do dashboard results equal profit?
No. Results are calculated from loaded chart plans and do not include spread, slippage, commission, or your account execution.
NEXT STEP